
How to Use TanStack Query (React Query) for Beginners
Say goodbye to messy useEffect code. Learn how TanStack Query simplifies API data fetching in React apps.

I first discovered TanStack Query (formerly known as React Query) when I joined my current project. At the time, I was still wrapping my head around how to manage data fetching efficiently in React. After spending some time learning it, I realized that TanStack Query is a powerful tool that can simplify many common problems developers face when working with APIs.
In this post, I’ll walk you through the basics of what TanStack Query is, why it’s useful, and how to get started using it in your own React project.

1. What Is TanStack Query?
Imagine you need to fetch data from an API and display it in your frontend. You also want to create new data and refetch the updated results from the server afterward.
This is where TanStack Query comes in—it helps you manage server state, meaning any data that comes from an external source like an API.
Without a library like TanStack Query, you’d typically rely on useState and useEffect to handle loading states, errors, and the fetched data. That works for small apps, but as your app grows, this approach can become repetitive and hard to manage.
Here’s a simplified example of what fetching data might look like without TanStack Query:
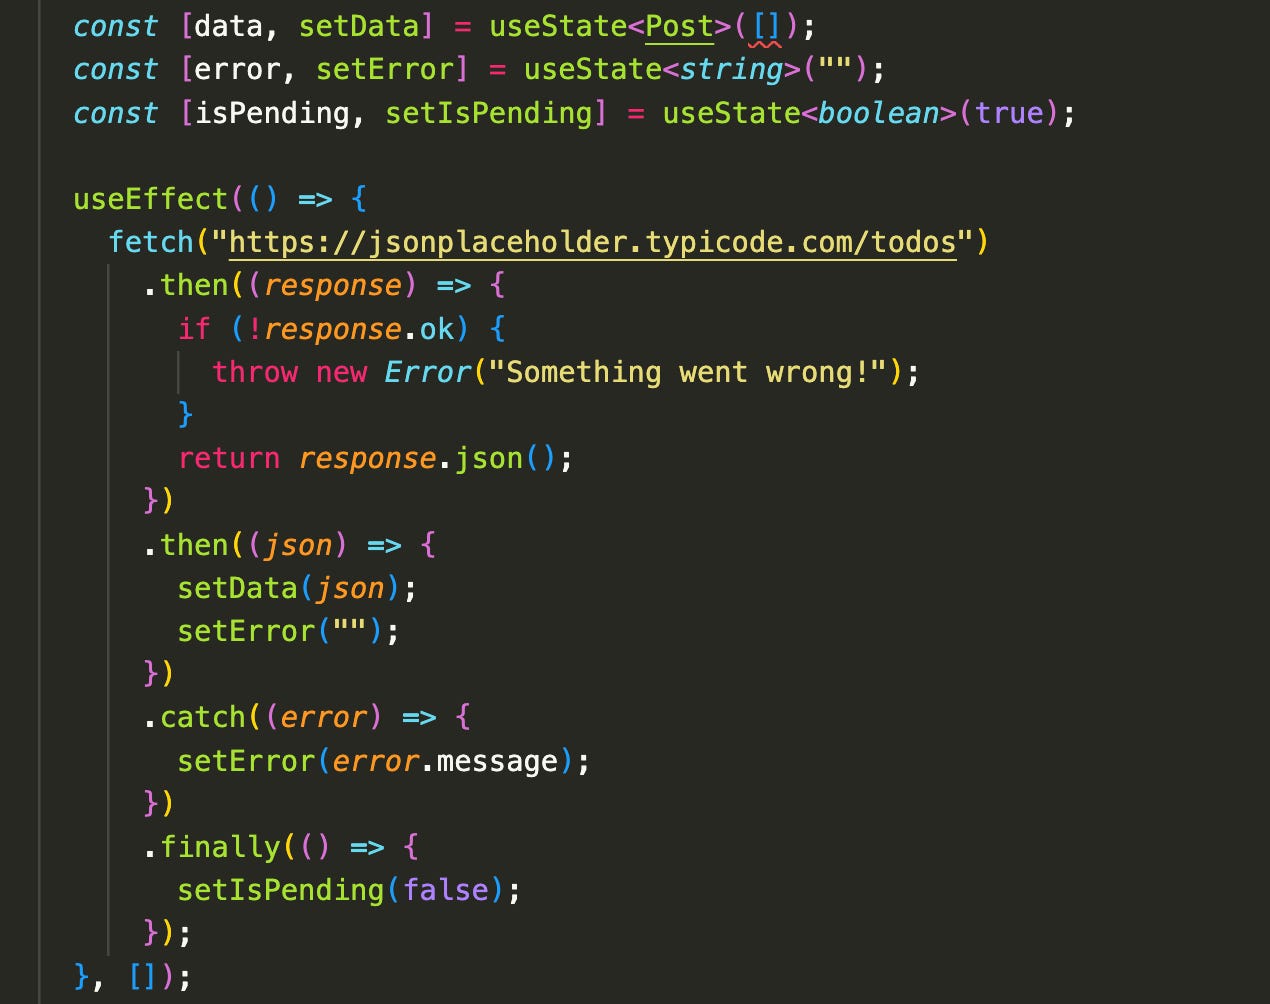
It gets the job done—but handling things like caching, background refetching, error handling, and sharing data across components can quickly become complex. In larger apps, you might even reach for a global state manager like Redux just to keep everything in sync.
That’s exactly where TanStack Query shines. It abstracts away the boilerplate and gives you powerful tools to handle server state more effectively.
2. Why Use TanStack Query?
TanStack Query simplifies all of the following:
Managing loading, success, and error states
Caching data to avoid unnecessary API calls
Handling refetching and stale data
Sharing data across components
Keeping your components cleaner and more focused
With just a few lines of code, you get all of these benefits out of the box.
3. How to Set Up TanStack Query in Your Project
Install the library
First, install the package:
npm install @tanstack/react-query
// To install dev tools (optional)
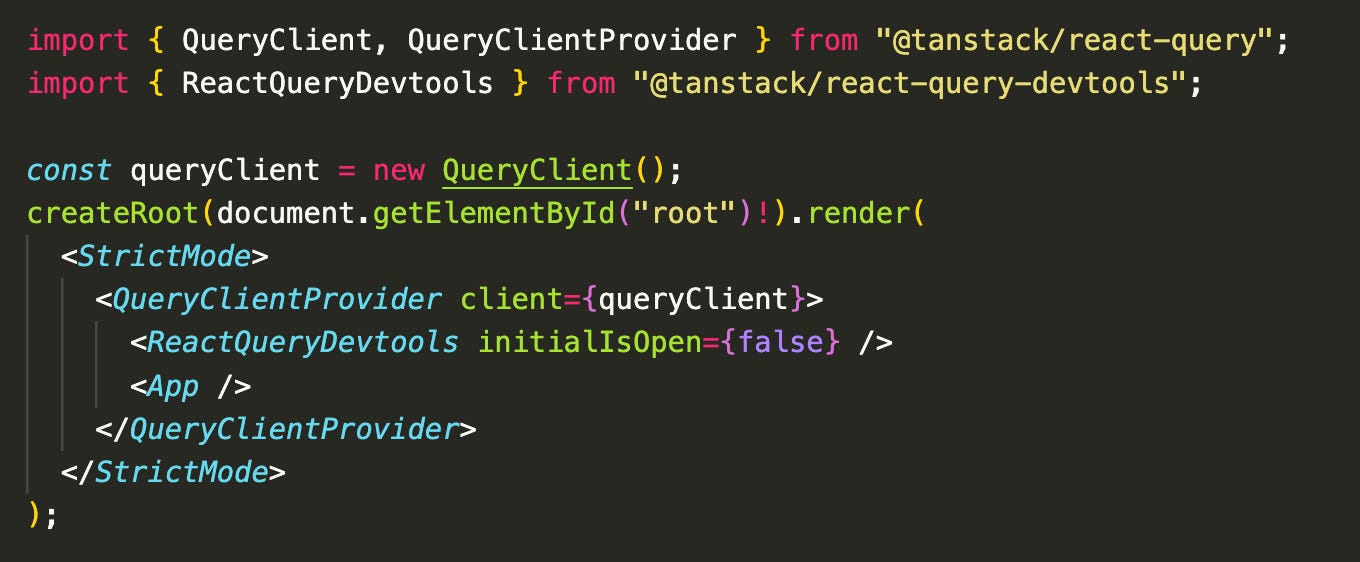
npm i @tanstack/react-query-devtoolsSet up the Query Client Provider
In your root file (like main.tsx or index.tsx), wrap your app with the QueryClientProvider:
4. Fetching Data with useQuery Hook
Now that TanStack Query is set up, let’s use it to fetch data.
Step 1: Create a Fetch Function
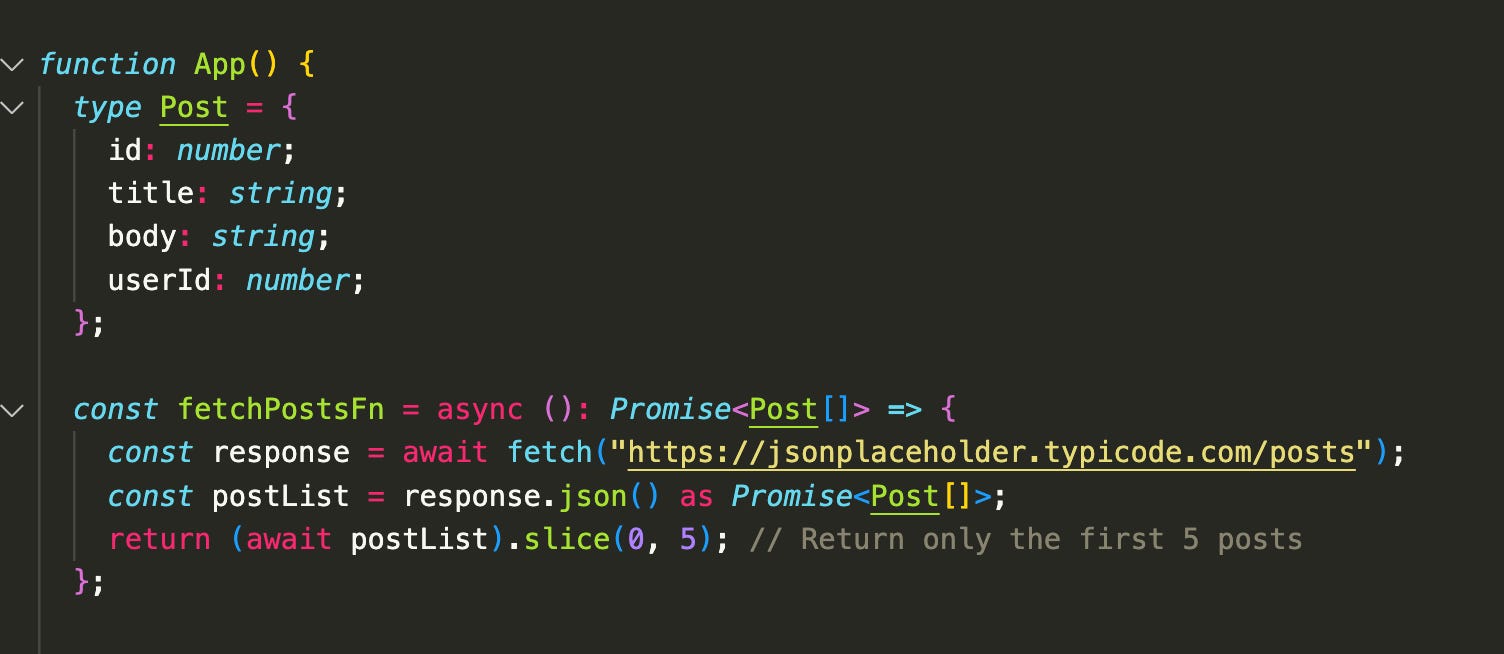
Step 2: Use the useQuery Hook
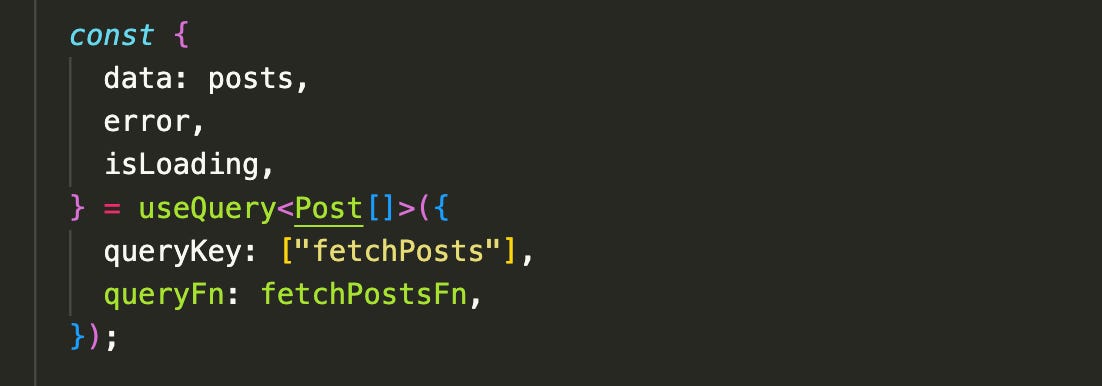
queryKey: A unique key to identify the data you're fetching. It helps with caching and refetching.queryFn: The function that fetches your data (in this case,fetchToDos).
The useQuery hook returns useful values:
data: The fetched dataisPending: Boolean indicating if the query is still loadingerror: Any error that occurred during the fetch
There are many other return values such as isError, isSuccess, refetch, etc., which you can explore in the official documentation.
5. Update / Create / Delete data using UseMutation Hook
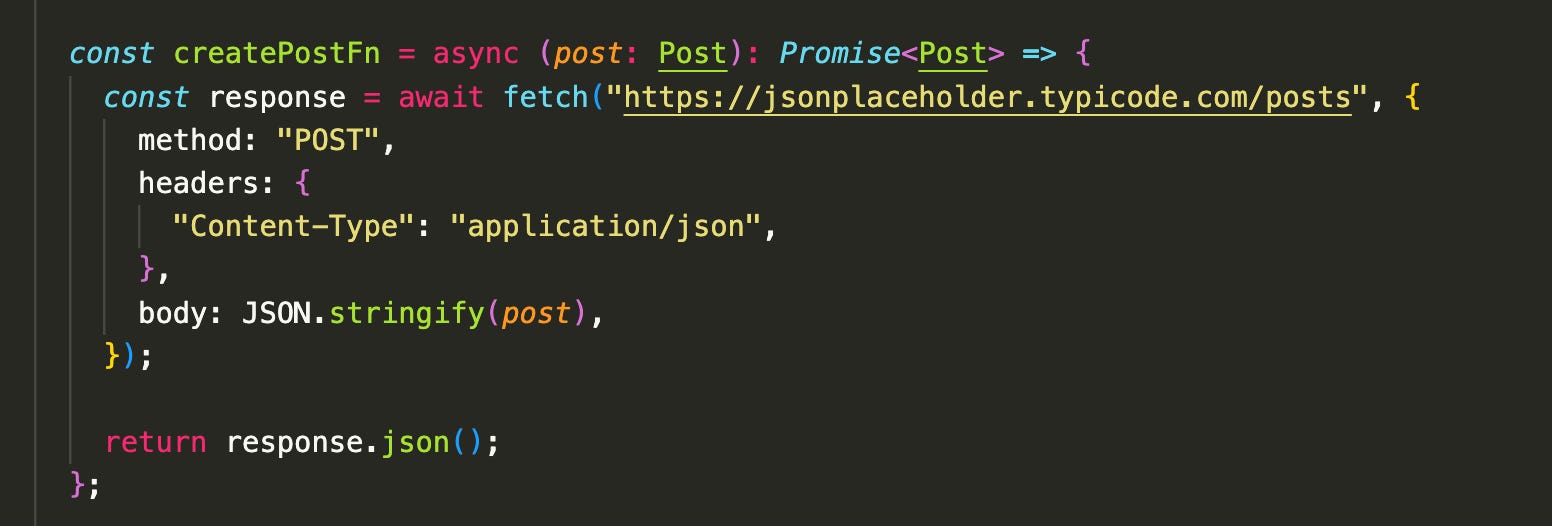
Step 1: Create function to update / create / delete data
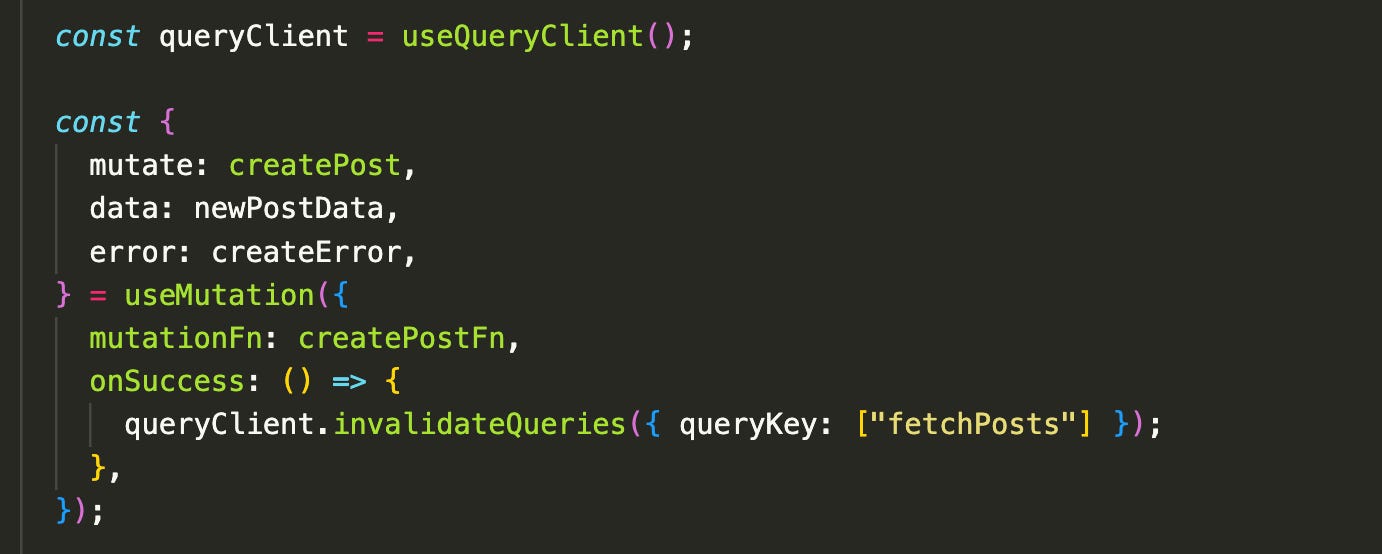
Step 2: Use useMutation Hook
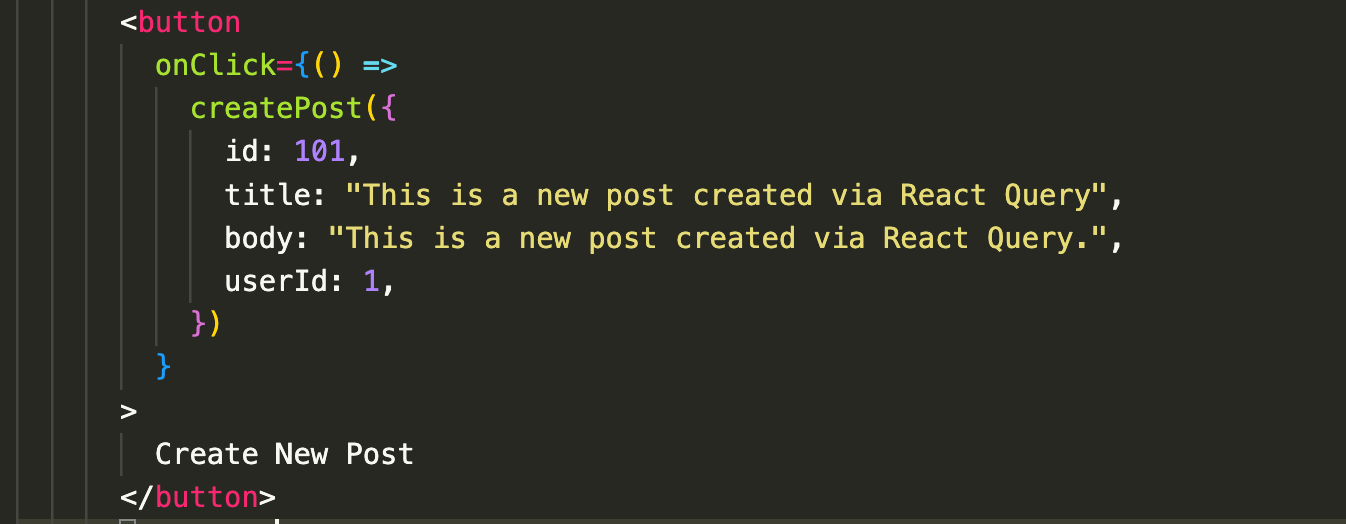
useMutation provides a mutate function that lets us manually trigger actions like a POST request—for example, when a user clicks a button.
By default, data fetched with useQuery is cached and won't be automatically refreshed. So after creating a new post, we need to “tell” TanStack Query to refetch the updated data. We can do this using the onSuccess callback along with queryClient.invalidateQueries, which marks the cached data as stale and prompts a refetch.
6. Full Code Example on GitHub
If you’d like to see the complete implementation, you can check out the source code on my GitHub repository here.
📝 Update Log:
[June 28, 2025] Initial post published.
[July 13, 2025] Clarified the explanation of useMutation and added an example for invalidateQueries.